Testing ID-Card API
To be able to test the integration we need a way to create QRCodes on demand. We have therefore made an endpoint that creates QRCodes based on some dummy users. This endpoint is only available in test environment.
Getting Test QR codes
Use /api/merchant/qrtest/{userNumber} to generate QR-Codes that can be scanned. The userNumber should be replaces with on of the pre-defined users bellow.
List of valid test users
| User Number | Name | Gender | Dob (yyyy.mm.dd) | Age |
|---|---|---|---|---|
| 1 | EDGAR HETLAND | MALE | 1980-09-02 | 43 |
| 2 | ANNETTE INGVILD BERGAN | FEMALE | 1994-09-02 | 29 |
| 3 | JAKOB HALVORSEN | MALE | 2010-03-05 | 14 |
| 4 | NORA SOLBERG | FEMALE | 2005-09-14 | 18 |
| 5 | MADS HANSEN | MALE | 2009-02-11 | 16 |
In this example we are getting a QRCode of user number 2.
Example Request
The response model consists of the QRCode as a byte array. ttl or time to live, this indicates how long the QRCode is valid in seconds. ts is a timestamp of when the QRCode was made in epoch-time. We also return the sessionId embedded in the QRCode as plain text, for the cases where a QRCode scanner is not available during testing.
Example Response
Postman Collection
To make it easier, we have created a Postman collection you can use to generate a BankId OIDC Token and test QRCodes as described above.
To use the Postman Collection, you will need to have obtained the client_id and client_secret from us. (Read more)
Setting up the Postman Collection
Postman Collection as json-file
-
Open Postman, select 'Import,' and import the collection you downloaded from the link above. Alternatively, you can drag and drop the collection.json file into the Postman window.
-
Fill in missing
client_id,client_secretand thescopeparameters in the body of the ID-card Test POST as shown bellow: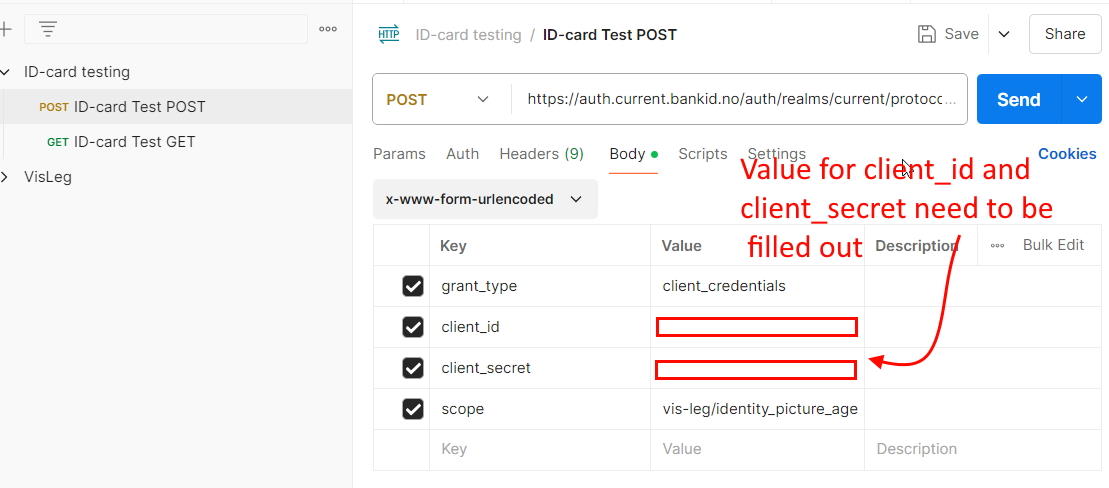
Setting Scope
The value for scope must be one that you have permission to use. Any other value will result in an error.
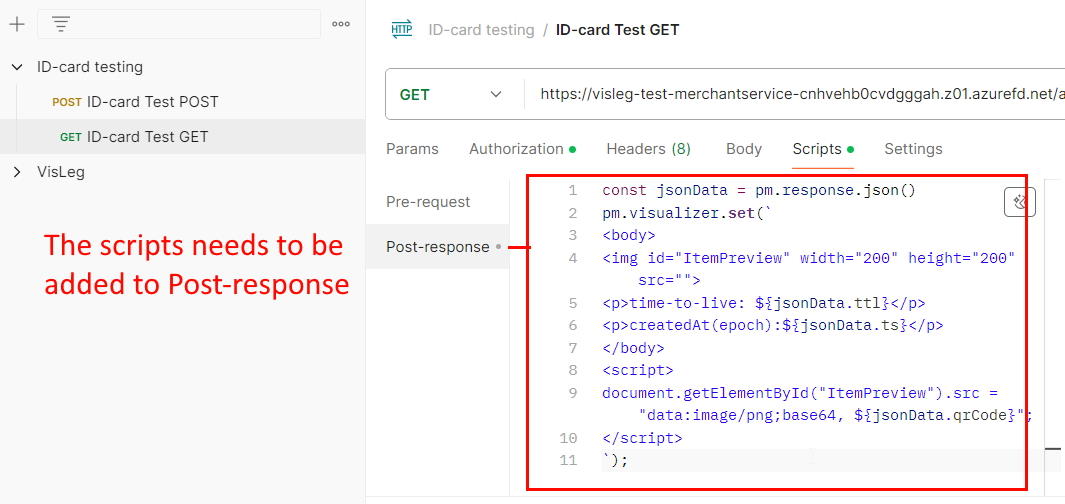
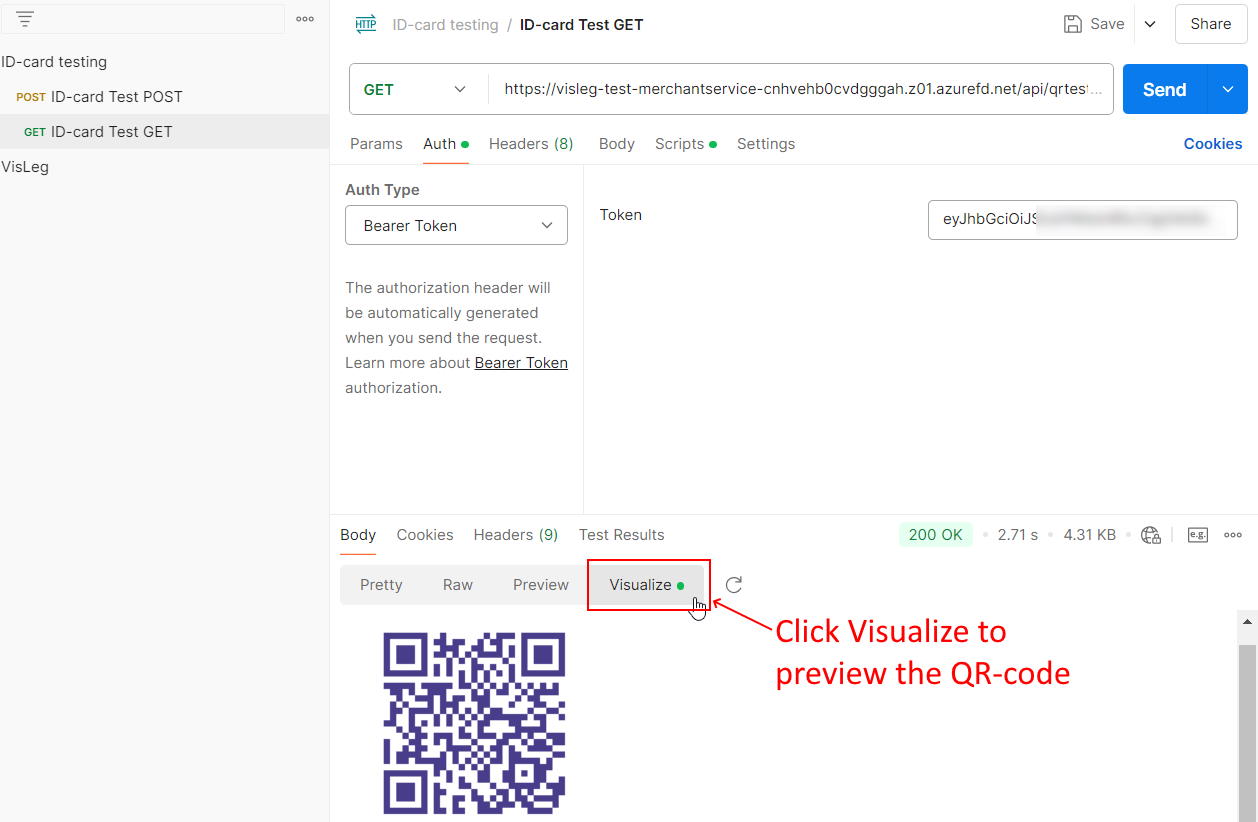
- Add QRCode visualization to the Post-Response script of the ID-card Test GET request to display the QRCode
Visualization script:
const jsonData = pm.response.json()
pm.visualizer.set(`
    <body>
    <img id="ItemPreview" width="200" height="200" src="">
    <p>time-to-live: \${jsonData.ttl}</p>
    <p>createdAt(epoch): \${jsonData.ts}</p>
    </body>
    <script>
    document.getElementById("ItemPreview").src = "data:image/png;base64, \${jsonData.qrCode}";
    </script>
`);
Using the Postman Collection
- Make a call to the ID-card Test POST with
client_id,client_secret, andscopeto recieve anaccess_tokenin the response.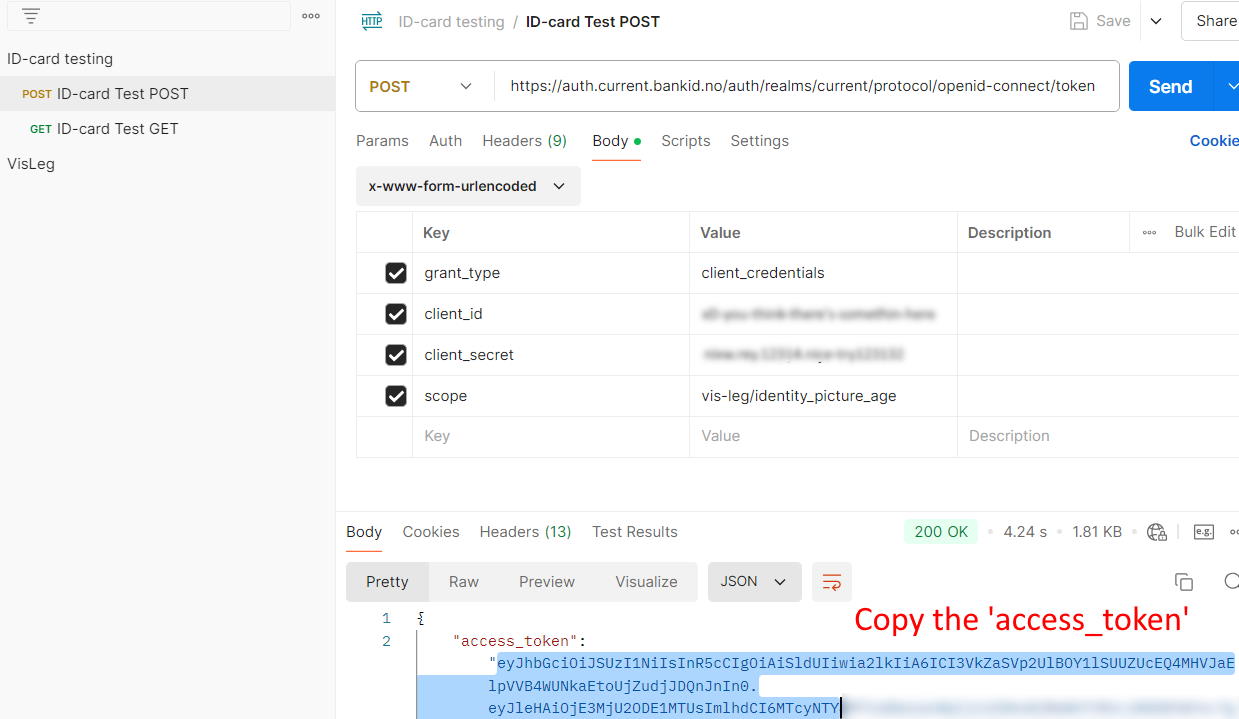
- Use the ID-card Test GET request with the
access_tokenset in the Authorization field using Bearer Token Auth.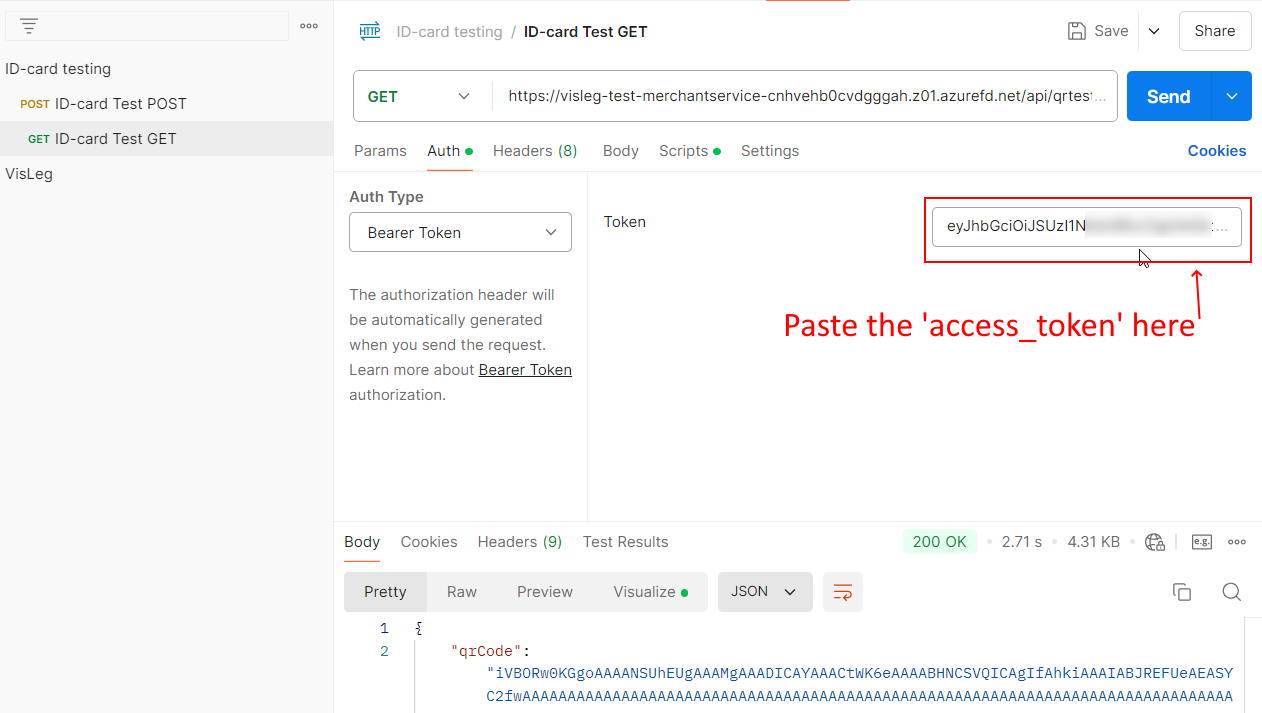
- Check the Visualize tab in the Body section to see the QRCode.
Using a QRCode
Now that we can generate QRCodes, they can be scanned as you would with a real user and get a sessionId.
Use that sessionId in api/merchant/session-endpoint to get the user data for that test user.
In this example we have a sessionId for user number 3.
Request